In this fourth instalment of our ZEPtechniques Mythbuster Series, we?ll be taking a look at one of the classic and most common myths in modern day mountain bike technique – the rider?s body position when descending. But before we get into it, take a look at our previous articles in the links at the bottom of this page to get a feel for what this series is about and why it?s important in helping rider?s not only improve their skills, but also improve their approach to learning through a ‘pro?s and con?s’ ethos, rather than ‘right and wrong.’ These articles also go into a bit more detail than usual, helping any instructors or riders with a taste for detail, get more out of them.
The Myth:
After teaching mountain bike technique for nearly twenty years, it amazes me just how many people still think that to ride downhill, you need to put your weight back. This might sound crazy to some of the more up-to-date riders amongst you, but we still see and hear this regularly in the industry today; be it from the public, out-dated instructors, magazines articles or videos. I even saw a recent video on YouTube featuring a pro-rider explaining this very technique, even though he wasn?t doing it himself. In short, this madness needs to stop! This being said, I think it?s important to look at why this myth exists in the first place?
THE BIKES:
In the good ol’ days of the 90?s, mountain biking was in a very different place than it is today. The bikes, trails and riding styles were all very different. This produced a downhill riding technique that involved moving the hips back, behind the seat, so the rider could also get lower on the bike. Since, much like modern XC bikes, the only way to get lower (for more stability) on a bike with its seat all the way up, is to move the hips behind the seat, this technique became the staple of the time. In the context of steep head angles, short wheelbases and seats all the way up, this technique actually makes sense. The problem occurs if a rider uses this same technique on a downhill bike or on any bike where the seat is lowered; which constitutes a large proportion of the mountain bike community today.
THE UNDERSTANDING:
The other reason this myth exists is simply from the misunderstanding of the physics that are involved with riding a bike downhill. This myth has then been regurgitated over the years by different magazine articles, videos and coaches who have never really questioned what it is they are teaching, and why they are teaching it that way. Simply put, people are just explaining something based on what they?ve been told before, rather than from truly understanding it themselves. This happens in every sport and this is why it?s important for any instructor or coach to make sure the training they?ve received is the best possible, and to update their knowledge and skills every few seasons.
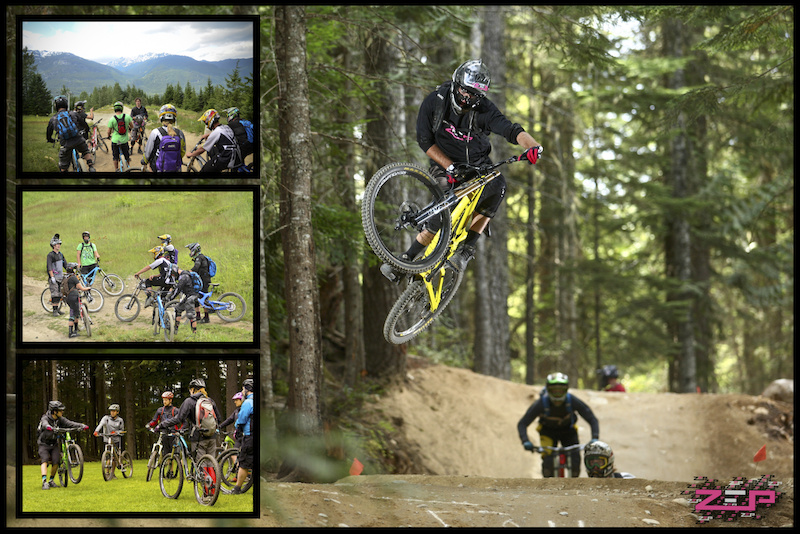
Professional coaching is key in making sure your skills are up to date; making your riding safer, more fun and a whole lot easier. Instructors need to stay up to date, too – a lot of these myths are being regurgitated far too often!
The Solution:
In simple terms, rather than moving back on a descent, the best bet is to stand up in a centred position on the bike. This is key to ensuring you are stable and in a good position to balance from. But what does this really mean when we say words like “stability” and “balance”?
STABILITY: The ability to resist forces
– The more stable the rider, the ‘stronger’ they are – they are harder to ‘push over.’
– More stability means more resistance to forces from the trail – more like a picnic table, less like a lamp.
– The lower and more centered an object’s centre of mass, the more stable it will be.
On a bike, this means having your weight centred between the two wheels. This not only makes the rider more stable but also improves traction (since both wheels are evenly weighted) and greatly helps balance.
BALANCE: The movements you make to manage instability
– If a rider were 100% stable they would be balanced – but this never really happens on a bike.
– The less stable the rider the more balancing is required to stay in control.
– Balancing helps riders manage instability, or recover and regain their stability.
– Balancing is easier if a rider has a better range of movement.
Stability and Balance are two sides of the same coin. You can’t have one without the other. A rider will never be perfectly stable, so there will always be the need to balance; moving the bike and body to adjust to changes in the terrain and react to the forces acting on the rider. In other words, good riding requires a strong position from which to move and adapt from meaning your position is just as important as being relaxed and mobile.

Being low and centred provides the best position for stability and range of movement, allowing the bike to adjust to the terrain underneath the rider. It’s also critical in helping keep both wheels evenly weighted, ensuring good traction front and rear.
So, being centred is already making sense, but riders with bad habits who have been riding for a long time (and watching too many YouTube videos) can still have a hard time trusting this centred, neutral and relaxed position. This logic is sometimes argued against because of what happens when we climb. But I can kind of understand this. To the lay person, moving forward on the bike when you climb, must mean you move back when you descend… it’s a fairly rational train of thought. However, the reality is entirely different and can be quite easily explained using the following examples.
– Find a short bank with a decent gradient, a smooth surface and a flat, safe run-out.
– Stand still on the slope (facing the bottom) and you should notice you are standing upright – your body is vertical.
– You do this because you are used to a world where the surface has friction, and the slope provides this.
– Next, walk slowly down the slope.
– Again, your body will be vertical as you ‘resist’ gravity from pulling you down the slope, faster than walking pace.
– Walking up the slope you will notice the same upright position because, again, you are resisting gravity.
– Next, from a standing start, allow gravity to pull you down the slope as fast as you feel comfortable with.
– You should end up running down the slope.
– You’ll notice your body is no longer vertical but more perpendicular to the slope, as you ‘let it go.’
– If you stayed upright, you would likely slip over backwards or at the very least find it very difficult to run!
Moving forward on the bike when you climb does not mean you move back descending. Understanding the physics behind this is key to improving your position on the bike or your coaching if you’re an instructor
Technically speaking, resisting gravity involves very different forces acting on the rider when compared to going with gravity. Similarly, the physics of when the rider is stationary compared to moving, are also different. Furthermore, the physics when moving along a flat surface and going up a slope, are also different when compared to moving down a slope.
In short, just because you stay upright when stationary or walking up the slope, does not mean you do the same when you let it go and run down the slope. In biking terms, just because you move forward on the bike when you climb, does not mean you move back when you descend. If you want to learn more about the physics behind this, feel free to check out this short, simple blog which explains some of this further; Balance Axis… tipping down the hill to stay centred. Otherwise, let’s move on to some real world examples.
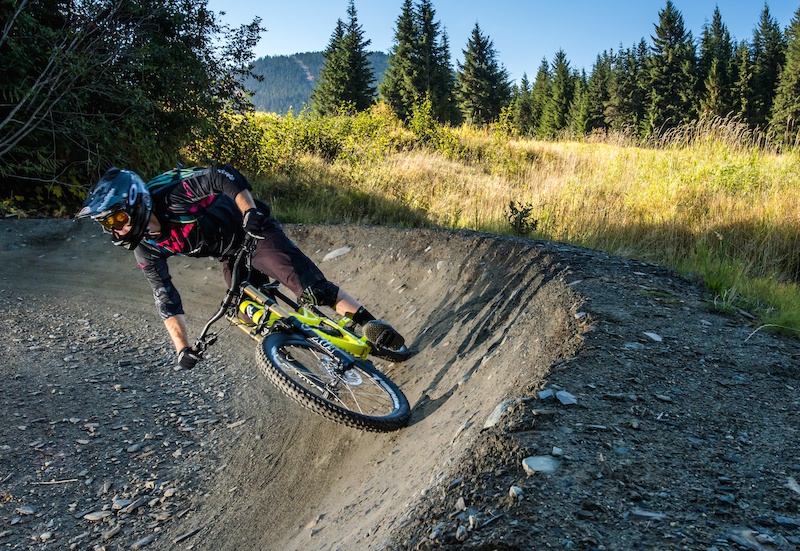
BODY POSITIONS FOR CORNERING… “DRIVE DON’T SURVIVE”
On groomed snow, do good skiers have their weight backwards? Nope, they tip downhill to keep their weight in the middle of the ski. Skiing with the weight over the back of the skis is unstable, makes it difficult for the skier to turn and they also lose edge grip since the front of the ski has less weight on it.
It?s the same for mountain biking. Leaning back greatly reduces stability, range of movement and front end traction, which makes cornering safely or consistently, very difficult. Improving your speed into, through and out of the corners, therefore, starts with a better position. To keep it simple, I’d like to highlight two key positions for descending and cornering; The ‘Neutral’ and ‘Ready’ Positions.
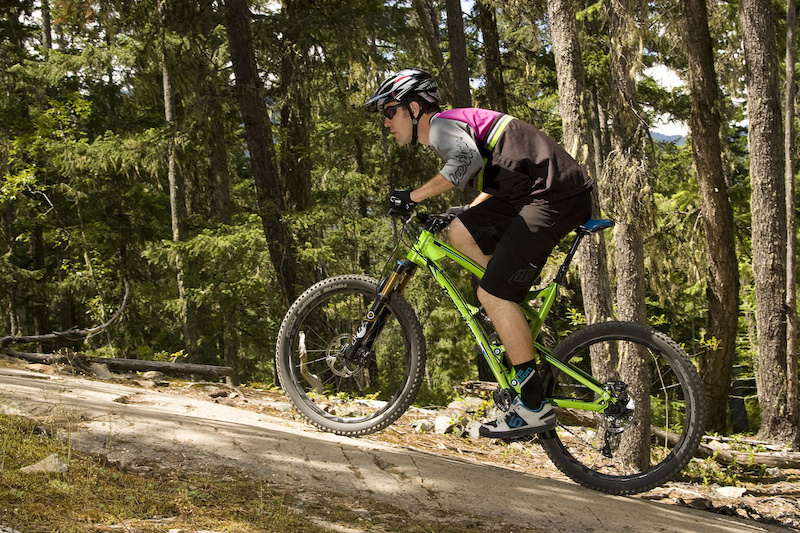
NEUTRAL POSITION: Riding taller to save energy, when the trail is mellow.
– Pedals level, standing up
– Chin over stem
– Taller and relaxed.
In a nutshell, many riders get low and stay low for too much of the time. Their legs get tired and they lose a lot of efficiency in their riding (especially on long descents or through a lot of berms) as their muscles are supporting their weight, the more flexed their joints are. So how do you find a better neutral position?
– Coast along a smooth flat surface.
– Stand on the bike, pedals level. Keep your chin over the stem (centred between the wheels)
– Now lock out your arms and legs. You should find yourself tall.
– Let your elbows and knees relax just slightly.
– You should feel relaxed, balanced, with a loose grip.
The Neutral Position – chin over stem, pedals level, taller and relaxed. This helps save energy which ultimately makes you stronger and more stable.
For many riders, it may feel a little too tall at first (especially if their habit is to keep low all the time), but as long as it feels different (for better or worse), this is good, as it’s you trying something new. If your riding is always feeling the same, you know it’s not progressing because you’re not doing anything different.
PROS & CONS
In the neutral position as you coast along, move the bike around underneath you. You may notice the range of movement you have isn’t very large, but the movement you do have, is very easy and ‘loose.’ On mellow trails (or sections of trail) where the terrain and speed are not as demanding, a large range of movement isn’t needed anyway, so this position is ideal in that it keeps you centred and mobile but prevents you from getting fatigued. Tired riders are often unstable as their legs and body are now too weak to properly deal with the trail and the various forces acting on them.
It is, however, a taller position, so in theory, it’s slightly less stable. Also, because of the lower range of movement (especially in your arms) then it’s not ideal for using when the trail gets rowdy, especially if it’s steep. However, it can be advantageous when there is a lot of pressure exerted on a rider like in a high speed berm, or under heavy braking. If you do a ‘push up,’ you will notice you are stronger nearer the end of your extension. The same biomechanics apply on the bike. If you are trying to resist your body from being squashed into the bike (like a berm), then a slightly taller position can help give you better strength, to do this.
Applying more of a neutral position in berms can save a lot of energy, improve consistency and maintain your speed. With straighter legs, you don’t have to push or work as hard to prevent your body from being pushed around, as you get compressed in the berm. Good riders constantly adjust between neutral ready based on speed, terrain and energy; faster/rougher = lower and wider. Slower/more mellow = taller, more relaxed.
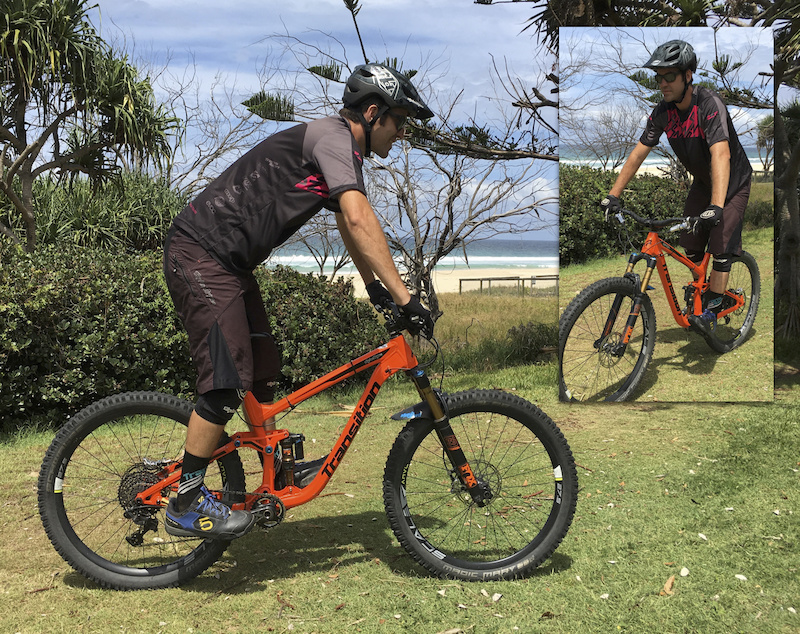
READY POSITION: Lower and wider for more stability and range of movement, when the going gets tough.
– Chin over stem
– Low & Wide
– Hinge at the waist & bend elbows to lower chest.
A common error in corners comes from riders having their weight too far back. This is often a result of their knees being too flexed in an effort to ‘get low.’ Instead of bending the knees to lower the hips, try hinging at the waist to lower the chest, keeping your chin over the stem so as not to let your position get too forward. This keeps you low and strong, preventing your legs from getting tired and ‘collapsing’ – the all too common reason why so many riders get pushed into the ‘back seat’ as the bike accelerates away from them in the corner. If this is new to you, it may take a while for it to feel normal but keep practicing and it will become second nature.
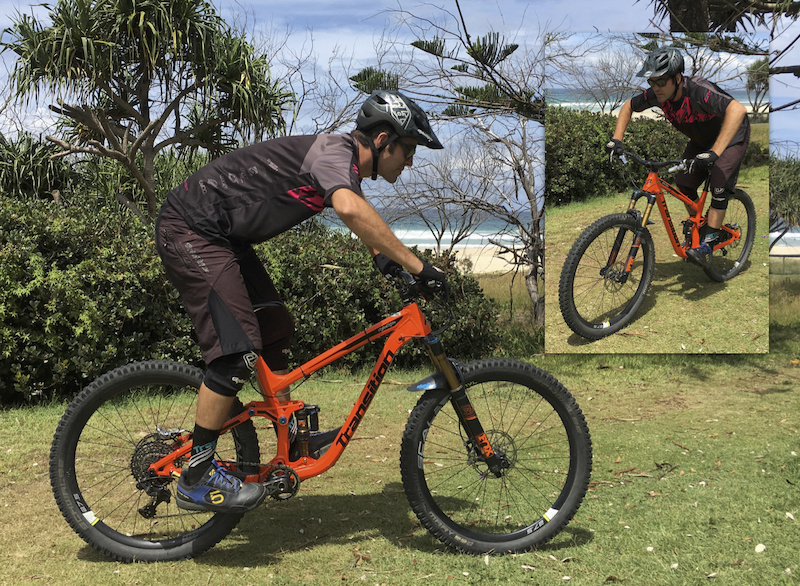
The ready position. Bending the elbows and hinging at the waist, help bring the upper body towards the bars. Keeping your chin over the stem will ensure you stay centred, as you get lower. Low and wide.
Here you can see the rider using a ready position. Notice he is hinged at the waist; the back is quite flat, with chin over stem and elbows out. He’s low, without bending his knees excessively.
Do the same thing as before… ride along in the ready position and move the bike around underneath you. Front to back and left to right. Your ‘sweet spot’ should be where you can relax your grip on the bars. This is important to feel as soon as your weight is too far back or too forward, you’ll notice you’ll have to grip much harder. This is a great indicator of your body position when you’re on the bike. If you have a lot of arm pump, it’s very often because of your riding position and not the braking bumps.
PROS & CONS:
Lower means more stable. It also means you’ve bent your elbows to lower your chest. This means you should have more range of movement to move the bike underneath you and let it adjust and flow with the terrain. Flow is key. Being dynamic and loose really helps you make all the subtle adjustments and balancing movements you need, to maintain balance and control. This being said, how you get low is important… you can obviously bend your knees a little bit more, but just be careful of only bending your knees. Steep trails or rough trails where there are a lot of ruts, bumps, steps, roll downs or drops, the ready position is your guy. If it’s mellow, though, stand up taller, relax and save some energy.
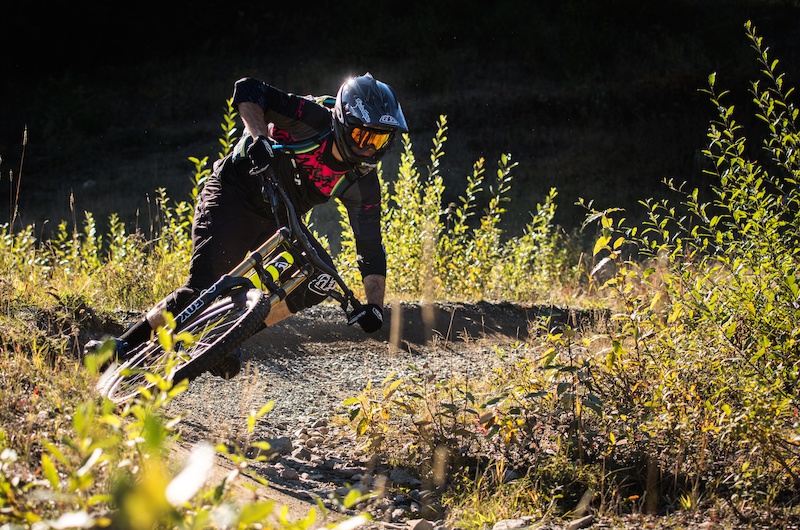
The ready position: Centered (chin over stem), low and wide. This position can really benefit your cornering… helping keep the rider low and stable, while providing more range of movement in the arms, to help adjust and lean the bike through the corners. This separation (moving the bike underneath the rider) is key for linking corners and holding your speed better.
COMBINING THEM: Being fluid and constantly adapting as needed.
Good riding isn’t about being in neutral or ready. It’s actually about seeing these two positions as simple reference points, from which you can move between. The idea is to be dynamic and fluid in your movements, allow the bike to move, and allow yourself to adjust between neutral and ready as much or as often as you need. If it’s super mellow, ride as tall as you like. If it gets a bit quicker, but it’s still quite smooth, perhaps just get a little lower. You get the point. Try not to be fixed in your positioning and you’ll gain the best of both worlds… stable, but efficient and adaptable. This is key if you want to boost your confidence, gain some consistency and maybe even go faster or tackle some harder terrain.
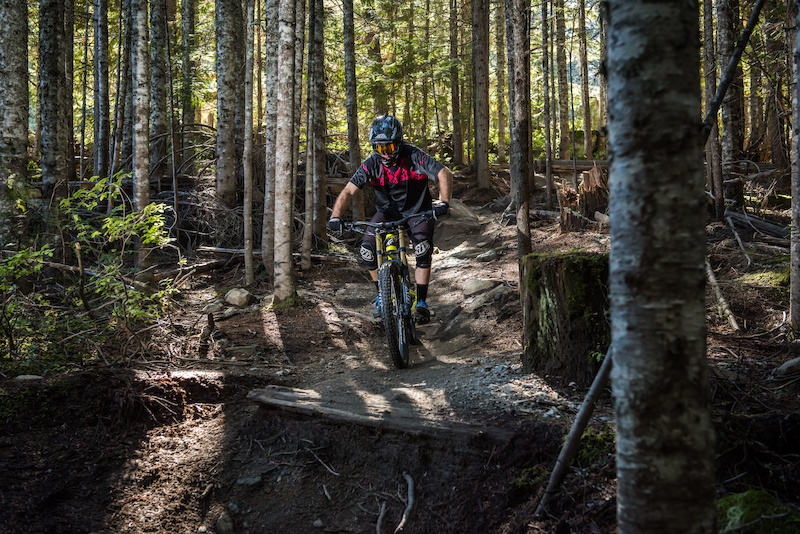
Here the rider is somewhere between neutral and ready. For his skill, speed and the terrain, he’s decided to get a little lower for some extra stability and range of movement, but not so low that he can’t pump, unweight the bike or stay reactive.
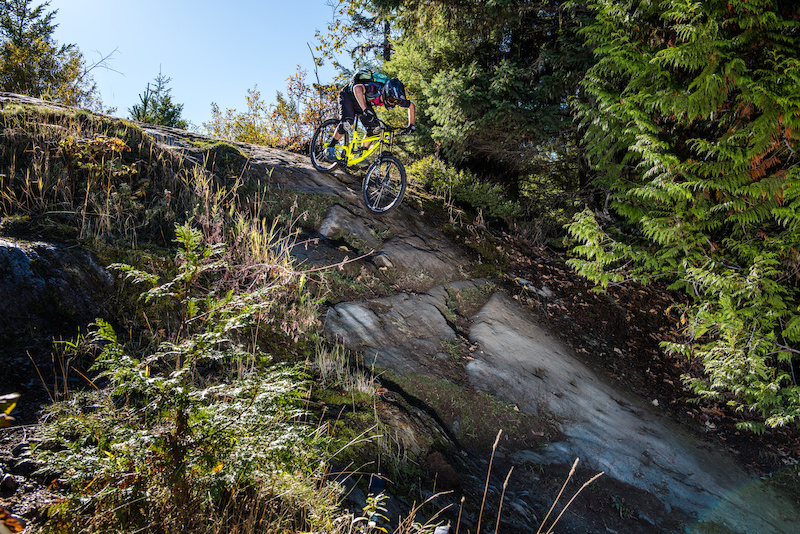
It’s all about viewing techniques not so much as right or wrong, but more like tools. Tools that you can choose to use based on your situation, skill level, terrain, and even body type. Obviously, some tools work much better more of the time (there are times when riding off the back of the bike is beneficial, like steep, sandy chutes) but the key is to try and maximize your riding by understanding that riding the same way all the time, is unlikely to help you progress. Be open to trying different techniques and keep working on building the number and quality of tools in your ‘tool belt.’
Take the pictures in this article, for example, try not to take them too literally. The neutral and ready positions can look a little different from one person to the next. People have different bodies and different bikes. Experiment and find what works best for you, just as long as you remember what doesn’t feel great in one situation, may be the perfect tool in another. And remember, all this info applies equally to whether you are riding your xc/trail/all mountain bike or riding your downhill bike – as long as you can lower the seat, the techniques are the same.
To wrap this all up I try to keep two simple things in mind when I’m riding and focusing on my position and balance;
1. “Are my wheels evenly weighted-ish?!”
2. “Am I driving (can I make adjustments if I want to) or surviving?”
Most of all, progress with small steps, have fun and enjoy your riding! In the next blog, we’ll take this further and have a look at your position and balance when it comes to riding steeps, rock rolls and for heavy braking.
Happy Trails,
Paul
About the Author
Paul Howard is the Owner-Director and Head Coach of ZEPtechniques, Technical Director of the Professional Mountain Bike Instructor Association, Head Snowboard Trainer for Whistler Blackcomb SnowSchool, Technical Education Committee and 2015 Interski Team Member for the Canadian Association of Snowboard Instructors, and has been teaching mountain biking and training mountain bike instructors around the world, since the late 90’s.
About ZEP
ZEPtechniques is a Whistler-based mountain bike camps and instructor training company. Established in 2006, ZEP offers single and multi-week, adult specific rider improvement camps, as well as weekly clinics, private lessons and tours. ZEP’s Instructor Training services include the industry’s original, multi-week mountain bike instructor training camps; training riders four days per week with evening seminars on suspension set up, bike mechanics, nutrition, as well as strength and conditioning sessions, all with industry experts. As developers of the internationally available Professional Mountain Bike Instructor (PMBI) Certifications and Directors of the PMBI Association, ZEP has long played a key role in establishing and improving the finest teaching practices and instructor certifications, within mountain biking.
ZEP is proudly supported by
Transition Bikes
ANVL Components
Fox Racing Shox
Troy Lee Designs
Five Ten
MRP
EVOC
Evolution Whistler
Vorsprung Suspension
Reel Cameras
Spun Studios
Starlight Custom Apparel
Photos
Bike Park Photos
Tim Hailwood Photography